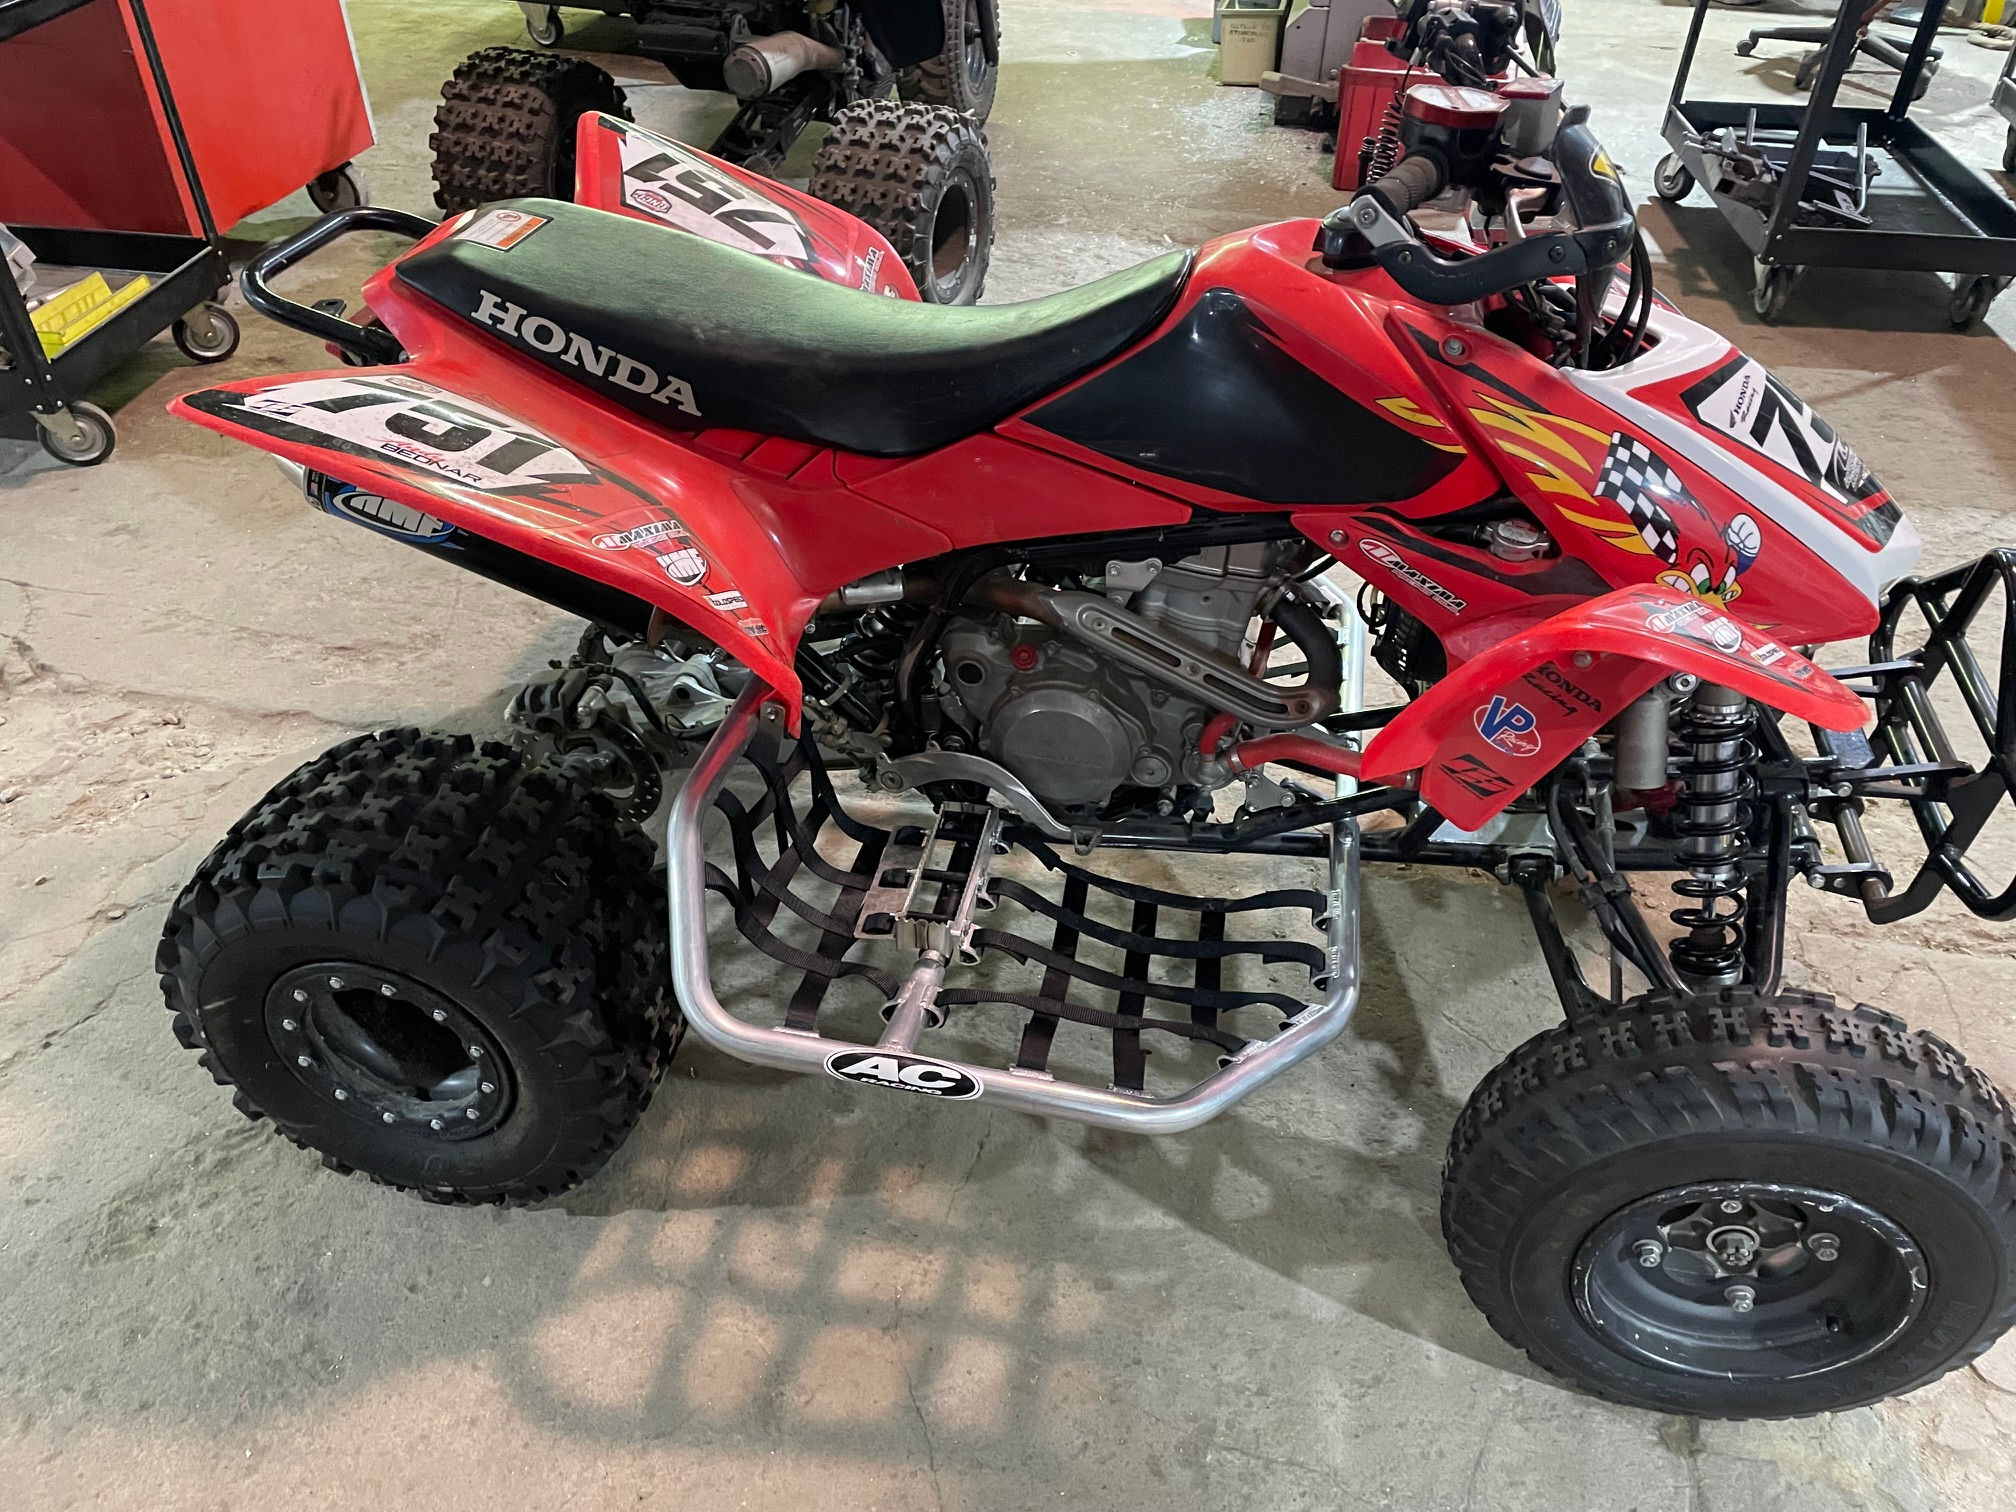
Installation instructions Honda TRX450 2006 - 2014
What's Included:
(2) Pro Peg Mounts
(1) Front Mount
(2) Pro Peg Nerf Bars
(1) Hardware pack includes:
(2) 8mm x 50mm bolts,
(2) 8mm x 40mm bolts,
(2) 8mm x 25mm Bolts,
(2) 8mm x 20mm bolts,
(16) 8mm flat washers,
(3) 8mm nylock nuts,
(6) 6mm x 80mm bolts,
(14) 6mm flat washers,
(8) 6mm nylock nuts,
(2) aluminum rear nerf bar brackets,
(2) front net mounts,
(2) rear net mounts
(4) Black Nets (2) front nets (2) rear nets
(2) Heavy-Duty Steel Construction Foot Peg Mounts powder coated black
(2) S/S Foot Peg Cleats
Aluminum Nerf Bars 1 5/16" x .130 wall aluminum tubing
Compatible: Honda TRX450R 2006-2014'
Installation Steps:
1. Park and secure your ATV. Place the TRX450R on a flat surface and engage the parking brake. Allow the engine to cool completely before beginning.
2. Remove the stock footpegs. Remove the bolts securing the OEM footpegs on both sides. Set the stock pegs aside. Wipe down the peg mounting brackets with a clean rag to remove any dirt, grease, or debris for a secure fit. Install the new peg mounts using stock bolts. Leave bolts loose for now. Remove motor mount bolts (front) both sides. Slide front mount into place and reinstall stock bolts. Leave them loose for now
3. Slide the nerf bars onto front mount and into end of pegs.
Now stand ATV up on rear grab bar. Make sure nerf bars are slid all the way together on the front mount. Now measure and mark 1" from end of nerf bar. Using 21/64 drill bit drill a hole through nerf bar and mount. Put a 8mm x 50mm bolt through the hole drilled using a 8mm flat washer on bolt sides and put a 8mm nylock nut finger tight. Repeat this step for the opposite side.
Set front of Quad back on the ground. Install the the (2) rear nerf bars brackets using 8mm x 20mm bolts and washers. The left bracket (short) bolts to the lower fender support bolt (6mm). The right bracket (long) bolts to the lower front muffler bracket. Tighten all mounting bolts and torque front motor mount and peg mounting bolts to manufacturer specs.
4. Install Net Brackets, and S/S Pegs
Slide the S/S pegs over the pins and align holes with pins. Using the 6mm x 80mm bolts slide them through a 6mm washer and then trough front net mount. There is a left and right mount. The right side net tab goes to the inside of the slot and the left side will be opposite. Install the rear net mount by sliding over the 6 x 80 bolts and use a 6mm washer before putting on the 6mm nylock nuts. Tighten all 6 bolts securely.
Install fender supports brackets. Use 8mm x 20mm bolt to attach bracket to nerf bar and 6mm x 20mm bolt to attach bracket to fender.
Install the nets. The front nets are longer than the rear. Slide them through the slots and back through the middle slot. Leave them loose until all straps are in place. Adjust nets to desired position.
5. Inspect and test.
Give each peg a firm shake to confirm there is no movement or play. Visually inspect the hardware on both sides before riding.
You're Ready to Ride. Your Pro Pegs are now installed and ready for the trail. Note: Always refer to your Honda TRX450R
service manual for model-specific torque specifications. If you have any questions about fitment or installation, contact us before riding. Sales1acracing@gmail.com